
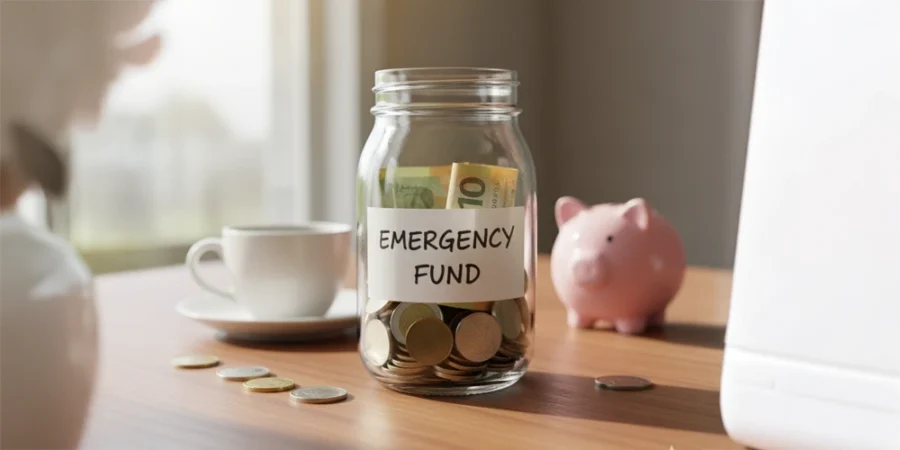
“I can barely make ends meet as it is – how am I supposed to save for emergencies?”
If this thought has crossed your mind, you’re not alone. For many New Zealanders living paycheck to paycheck, the idea of building an emergency fund feels like a luxury reserved for people with money to spare. But here’s the truth: an emergency fund isn’t a luxury – it’s a necessity that can prevent minor setbacks from becoming financial disasters.
The good news? You don’t need a high income to start building financial security. What you need is a strategy that works with your reality, not against it. Let’s explore five practical ways to build an emergency fund, even when money is tight.
Why an Emergency Fund Matters (Especially When Money Is Tight)
Before diving into strategies, let’s address why this matters. When you’re already stretched thin financially, an emergency fund isn’t just nice to have – it’s your shield against debt.
Without savings, unexpected expenses force impossible choices: put it on the credit card and pay interest for months, skip paying another bill, or borrow from friends and family. A flat tire, broken washing machine, or sudden job loss can trigger a downward spiral that takes years to recover from.
Even a small emergency fund of $500-$1,000 can cover most common unexpected expenses: a medical co-payment, minor car repairs, a replacement phone, or urgent vet bills. This buffer is the difference between a temporary inconvenience and a long-term financial crisis.
How Much Do You Really Need?
The traditional advice suggests 3-6 months of expenses in an emergency fund, but when you’re on a tight budget, that number can feel overwhelming and demotivating. Instead, focus on milestone goals:
Start with $500: This covers most small emergencies and gives you breathing room.
Build to $1,000: This handles the majority of unexpected costs that life throws at you.
Aim for one month’s expenses: Calculate your essential monthly costs and work toward covering one full month.
Eventually reach 3-6 months: Once you’ve mastered saving, gradually build toward the full recommended amount.
Starting small isn’t settling – it’s being strategic. A $500 emergency fund you actually achieve is infinitely more valuable than a $10,000 goal that feels impossible and keeps you from starting at all.
Strategy 1: Start Impossibly Small (The $1 Method)
The biggest obstacle to saving isn’t the amount – it’s starting. When you convince yourself you need to save $100 per week, you never begin. So instead, start with an amount so small it feels almost pointless: $1 per day.
How it works:
Every single day, transfer $1 from your spending account to a separate savings account. Just one dollar. You won’t miss it, and you can’t make excuses about not affording it.
After one week: $7 After one month: $30 After six months: $180 After one year: $365
That’s $365 you didn’t have before, and here’s the secret: once the habit is established, increasing the amount becomes natural. After a few weeks of saving $1 daily, try $2. Then $3. Small increments feel manageable, but they compound significantly.
Real example: James, a student in Christchurch, started with $1 per day using automatic transfers. After three months, he barely noticed the money leaving his account, so he increased it to $2 per day. Within a year, he was comfortably saving $5 daily and had accumulated $1,200 – enough to cover a medical emergency that would have otherwise gone on his credit card.
How to implement:
- Set up a separate savings account (many banks offer free online savings accounts)
- Create an automatic daily or weekly transfer for $1
- Don’t touch this account except for genuine emergencies
- Every few months, increase the amount by $1 if possible
Strategy 2: Save Your “Spare Change” (Digitally)
Remember when people used to save loose change in a jar? The digital version is even more powerful and requires zero effort once set up.
Several banking apps and financial tools now offer “round-up” features that automatically save your spare change. Every time you make a purchase, the amount is rounded up to the nearest dollar, and the difference goes straight into savings.
How it works:
Buy a coffee for $4.50? The system charges you $5 and saves the $0.50 difference. Get groceries for $67.30? It rounds to $68 and saves $0.70. These micro-savings are completely painless because you never see the money in your spending account.
Monthly savings potential:
If you make 15 transactions per week (not unusual with tap-and-go culture), you might save an average of $0.50 per transaction. That’s:
- $7.50 per week
- $30 per month
- $360 per year
And you literally did nothing except enable a feature.
Popular options in New Zealand:
- ASB’s “Save the Change” feature
- BNZ’s “RoundUp” tool
- Westpac’s “Save-as-you-go”
- Independent apps like Sharesies (which also invests your savings)
Pro tip: Some systems let you multiply the round-up amount. If saving $0.50 feels easy, try doubling or tripling it. A 3x multiplier on that coffee purchase means $1.50 goes into savings instead of $0.50.
Strategy 3: The 24-Hour Challenge Savings
This strategy doesn’t require you to find extra money – it helps you stop spending money you were about to waste on impulse purchases.
The rule: Before buying any non-essential item, wait 24 hours. If you still want it tomorrow, you can buy it. If not, transfer the money you would have spent into your emergency fund.
How it works in practice:
You’re browsing online and see a $45 shirt you love. Instead of clicking “buy now,” you close the tab and set a reminder for tomorrow. The next day, you realize you don’t need it as much as you thought. Transfer that $45 to savings.
You’re at the supermarket and almost grab a $12 ready-made meal deal. You remember the 24-hour rule, put it back, and make pasta at home instead. The $12 goes to your emergency fund.
Why this works:
Research shows that 50-60% of impulse purchases wouldn’t happen if people waited just 24 hours. The initial emotional excitement fades, and rational decision-making takes over. This strategy essentially converts regret prevention into savings.
Monthly savings potential:
If you avoid just one impulse purchase per week averaging $20, that’s $80 per month or $960 per year. For many people, the actual number is much higher once they become aware of their spending patterns.
Make it effective:
- Keep a running total of “money not spent” – it’s motivating to see the wins
- Take a screenshot of items you decided not to buy – reviewing them weeks later confirms you made the right choice
- Make the savings transfer immediately, not “later” (or it won’t happen)
- Celebrate each time you resist temptation and save instead
Strategy 4: Monetize What You Already Have
You don’t necessarily need to earn more money – you might already have money trapped in unused belongings around your home. Converting clutter into cash serves double duty: it declutters your space and jumpstarts your emergency fund.
Low-effort selling strategies:
Trade Me or Facebook Marketplace: Take 20 minutes this weekend to photograph and list 5-10 items you no longer use. Common winners include:
- Clothes in good condition (especially brands)
- Electronics gathering dust
- Books, DVDs, and video games
- Kitchen appliances you never use
- Sporting equipment from abandoned hobbies
- Furniture that doesn’t fit your space
Expected returns: Even “cheap” items add up. Five items at $20 each is $100. Ten items averaging $35 is $350.
Targeted selling approach:
Instead of randomly choosing items, ask yourself: “What could I sell this week that would get me to my first $500?” Then focus on those specific, higher-value items first. Your old laptop might be worth $200. Those concert tickets you can’t use? $150. The bike you never ride? $300. There’s your first milestone.
Don’t forget digital decluttering:
Cancel subscriptions you’re not fully using and redirect that money to savings:
- Gym membership you never use: $60/month = $720/year
- Multiple streaming services: Keep one, ditch two: $30/month = $360/year
- Magazine subscriptions: $10/month = $120/year
- Premium app subscriptions: $15/month = $180/year
Real example: Sophie in Wellington committed to a “sell-something Saturday” for eight weeks. Each weekend, she listed items on Facebook Marketplace while having her morning coffee. She sold old textbooks, a bread maker she’d used twice, outgrown clothes, and miscellaneous electronics. Total earned: $640, which became her first emergency fund.
Strategy 5: Automate Your Savings (Pay Yourself First)
This is the single most effective savings strategy, and it works especially well for tight budgets because it removes willpower from the equation.
The concept: Instead of saving what’s left over at the end of the month (spoiler: there’s never anything left), you save first and spend what remains.
How to implement:
Set up an automatic transfer from your main account to your savings account on the day you get paid. Even if it’s just $20 per paycheck, automating makes it happen consistently.
Why automation works when budgets are tight:
When money leaves your account before you see it, you naturally adjust your spending to match what’s available. You can’t miss money you never had access to. It’s the same psychological principle behind KiwiSaver – you don’t feel deprived of that money because it never hits your everyday account.
Start with tiny amounts:
If you’re paid fortnightly, even $10 per paycheck is $260 per year. If you’re paid weekly, $5 per week is $260 per year. Once you adjust to living without this money (which happens faster than you’d think), increase it by small increments.
Progression example:
- Month 1-2: $10 per paycheck
- Month 3-4: $15 per paycheck (you’ve adjusted to the lower amount)
- Month 5-6: $20 per paycheck
- Month 7-12: $30 per paycheck
By the end of the year, you’re saving $780 annually, and it feels no different than when you started with $10.
The psychological trick:
Set up the transfer for the same day your pay arrives, ideally an hour or two after the deposit hits. This way, you never see that money in your available balance. Your brain treats your available balance as “what I have to spend,” making the savings invisible and painless.
Bonus strategy: Some employers offer split-pay services where a portion of your salary goes directly into a separate account. If your employer offers this, it’s even better than automatic transfers because the money never touches your main account.
Combining Strategies for Maximum Impact
The real magic happens when you stack these strategies together. You don’t have to choose just one – you can use all five simultaneously:
- Automate $20 per paycheck (Strategy 5): $520/year
- Save $1 per day manually (Strategy 1): $365/year
- Use round-up savings (Strategy 2): $360/year
- Avoid 2 impulse purchases per month (Strategy 3): $480/year
- Sell unused items once (Strategy 4): $300 one-time
Total first-year emergency fund: $2,025
That’s more than the recommended starter emergency fund, achieved through small, manageable actions that don’t require a pay rise or extreme frugality.
Protecting Your Emergency Fund
Once you start building savings, protect it fiercely:
Keep it separate: Use a different bank or an account that takes a day to transfer from. This friction prevents impulse dipping.
Define what counts as an emergency: True emergencies are unexpected and necessary: car repairs, medical bills, urgent home repairs, job loss. Wants disguised as emergencies: concert tickets, sales, holidays.
Replace what you use: If you need to dip into your emergency fund, immediately restart your savings plan to replenish it.
Don’t touch it for opportunities: A great sale isn’t an emergency. A new phone when yours works isn’t an emergency. Only genuine unexpected needs count.
The Psychological Shift
Building an emergency fund on a tight income isn’t really about money – it’s about mindset. It requires shifting from “I can’t afford to save” to “I can’t afford not to save.”
Every dollar you save is a dollar you won’t have to borrow at 20% interest when your washing machine breaks. It’s a dollar that keeps you from having to ask family for help. It’s a dollar that gives you options instead of forcing desperate decisions.
Start today. Not next month when you “have more money.” Not after you “get organized.” Today. Transfer $1 right now. List one item for sale. Set up automatic savings for your next payday. Cancel one unused subscription.
Financial security doesn’t require a high income. It requires starting small, staying consistent, and giving yourself the grace to build slowly. Your emergency fund doesn’t need to be perfect – it just needs to exist.
Your First Week Action Plan
Ready to start? Here’s what to do in the next seven days:
Day 1 (Today):
- Open a separate savings account if you don’t have one
- Transfer $1 into it manually
- Choose one item to sell this week
Day 2:
- Set up automatic round-up savings if your bank offers it
- List the item you chose yesterday for sale
Day 3:
- Transfer another $1 to savings
- Identify one impulse purchase you can avoid this week
Day 4:
- Review upcoming paycheck – decide on automatic transfer amount
- Look for one subscription you can cancel
Day 5:
- Transfer another $1 to savings
- Set up your automatic transfer to start next payday
Day 6:
- Practice the 24-hour rule on any non-essential purchase today
- If you avoid an impulse buy, transfer that amount to savings
Day 7:
- Review your progress – how much have you saved in one week?
- Plan next week’s actions to keep momentum going
The Bottom Line
You don’t need a financial windfall to build an emergency fund. You need small, sustainable habits that fit your current reality. Start with what feels achievable, even if that’s just $1 per day. Automate whatever you can. Monetize what you already own. Stay consistent.
In six months, you’ll be surprised how much you’ve accumulated. In a year, you’ll have a genuine financial cushion. In two years, you’ll wonder how you ever lived without this security.
The best time to start building your emergency fund was last year. The second-best time is right now, today, with the first dollar.